How to start a conference in Zoom using SplitCam
Zoom Conference Guide with SplitCam.
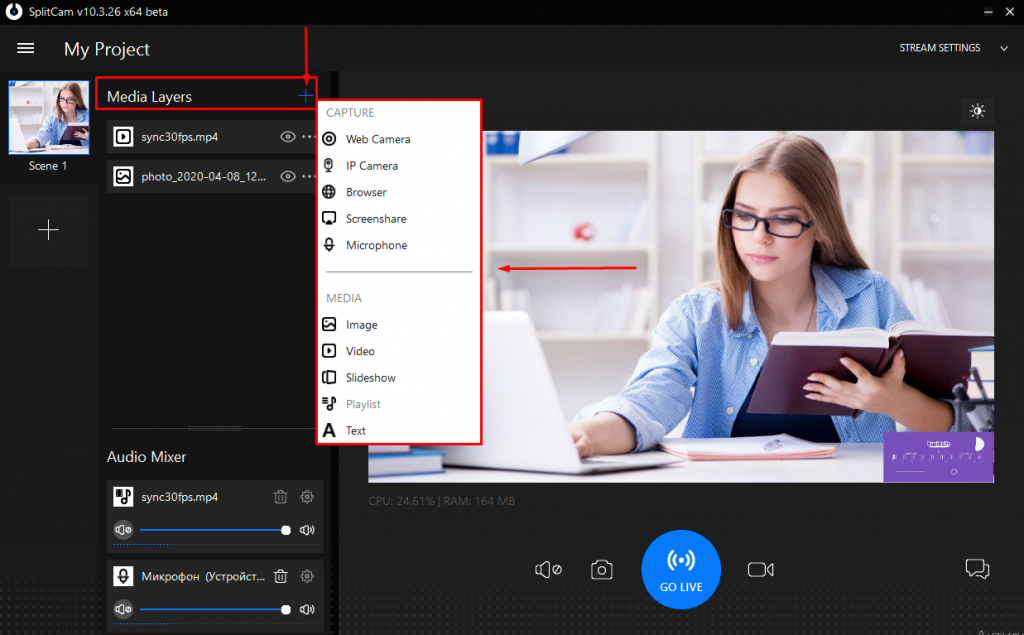
First, open SplitCam and configure the scenes that we will transfer through Zoom.
To do this, click on “Media Layers +” and fill our scene.
You can add:
- Webcam.
- IP camera.
- Browser.
- Screen / Single window.
- Microphone.
- Or various media files, such as: pictures, videos, slideshows, audio, or text.
You can find individual guides for adding objects on our website:
https://splitcam.com/en/help-ru
Or on the official YouTube channel SplitCam:
https://www.youtube.com/channel/UCgFRQMJCK8E00ODT-AZDhEw/
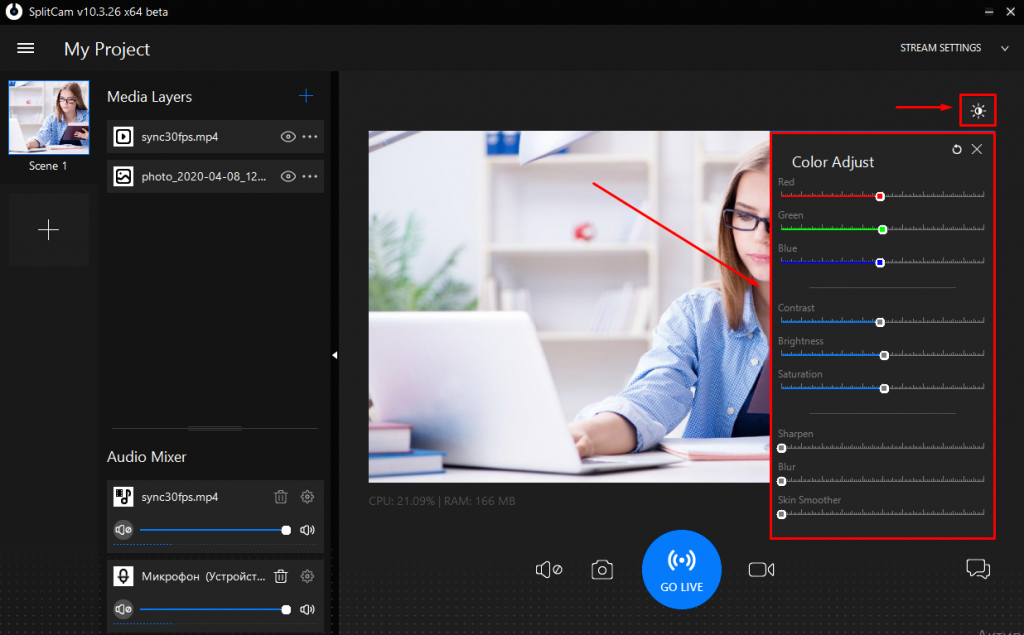
Also, the program has the function “Color adjust”, which will help to remove image defects, adjust color, brightness, contrast and other parameters.
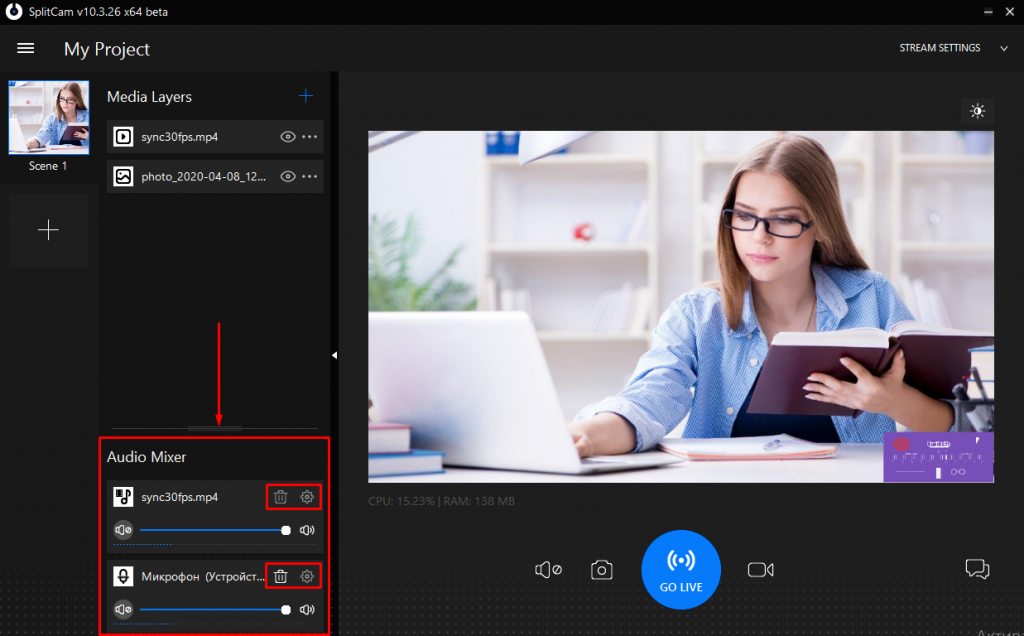
Below under the inscription Audio Mixer we can see from what sources the sound comes from in our scene.
We can adjust the volume of each source, as well as adjust or delete individual ones.
In this case, we see that in our scene there are 2 sound sources: 1 video clip and 1 microphone.
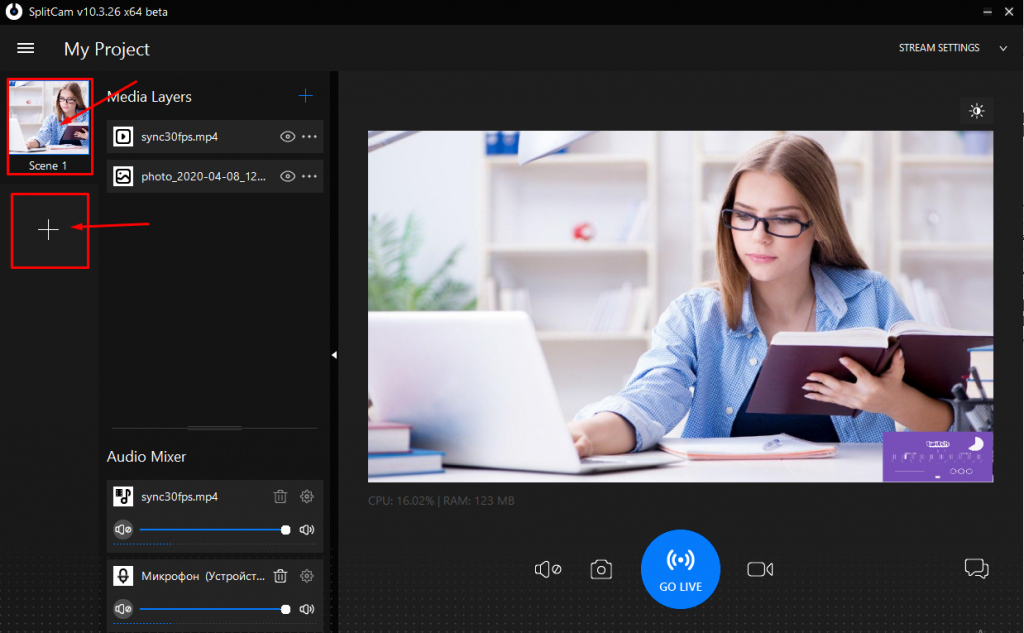
If you need more than one scene, but several, you can create the required number by clicking on the “+” on the left. You can also switch between customized scenes by clicking on them.
Once the scene setup is complete, go to the Zoom program.
If you are entering the program for the first time, then in the “Enter Audio Conference” dialog box that opens, select “Test speaker and microphone.”

Open the “Speaker” context menu and select “Speakers (SplitCam virtual audio device)” and click on the Yes button.

Next, in the “Microphone” context menu, select the SplitCam source and click Yes.

Next, in the lower left corner, click on the arrow next to the word “Stop video” and select “SplitCam Video driver” in the list that opens.
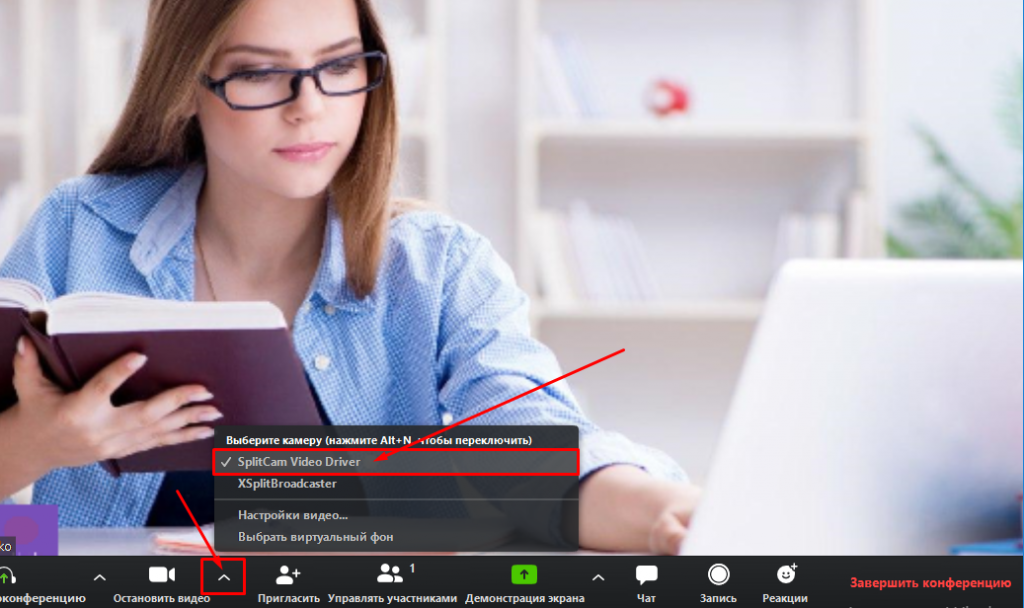
Now, to output and input sound, as well as images in the Zoom program, our SplitCam scene is used by default.
For the conference, it remains only to invite participants.
Click “Invite” and choose the convenient way for us to invite conference participants.

